Concept Studio guide

From rough build idea to visual handoff.

A clean operating guide for using Habivista Concept Studio, the Studio visual editor, report exports, and Azunus review handoff.

Concept Studio outputs are early visualizations only. They are not approved plans, structural designs, permit-ready drawings, certified documents, or construction instructions.
Studio editor overview

Last verified on 10 May 2026 against the Habivista test domain and Studio visual editor.

Watch first

Walkthrough videos

Watch the full module in motion. Use these recordings to demo the entry path, assistant flow, and visual editor before walking a client through it live.

1 of 3

Step-by-step

Run the module without losing the client.

The flow is simple: intake, handoff, edit, export, and review. Each row below has one job.

01

Start from Concept Studio

Open the Concept Studio page to explain the workflow, start the AI intake, or move directly into the visual editor.

  • Use Try the assistant when a client has only a rough idea.
  • Use Open visual Studio when you already know the template or want to demo the editor.
  • Keep the concept-only disclaimer visible during demos.
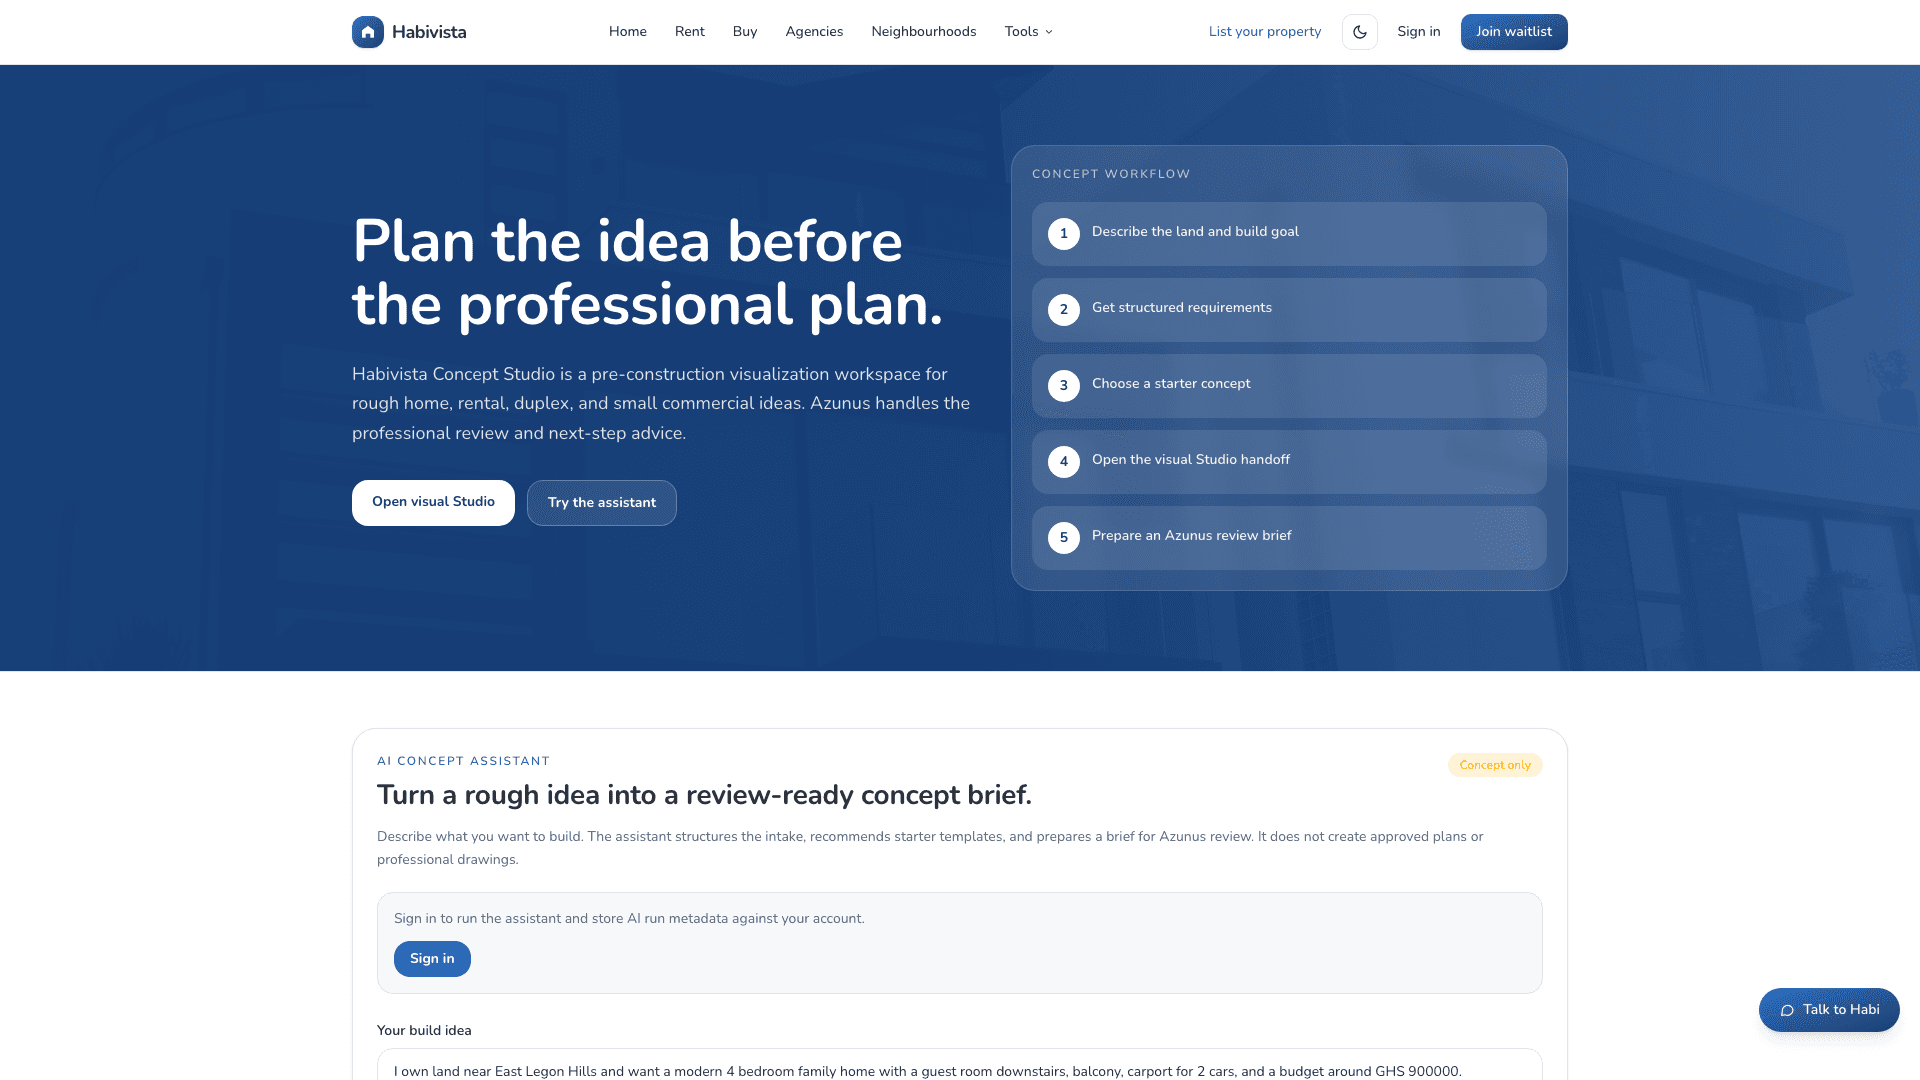
Concept Studio overview page

02

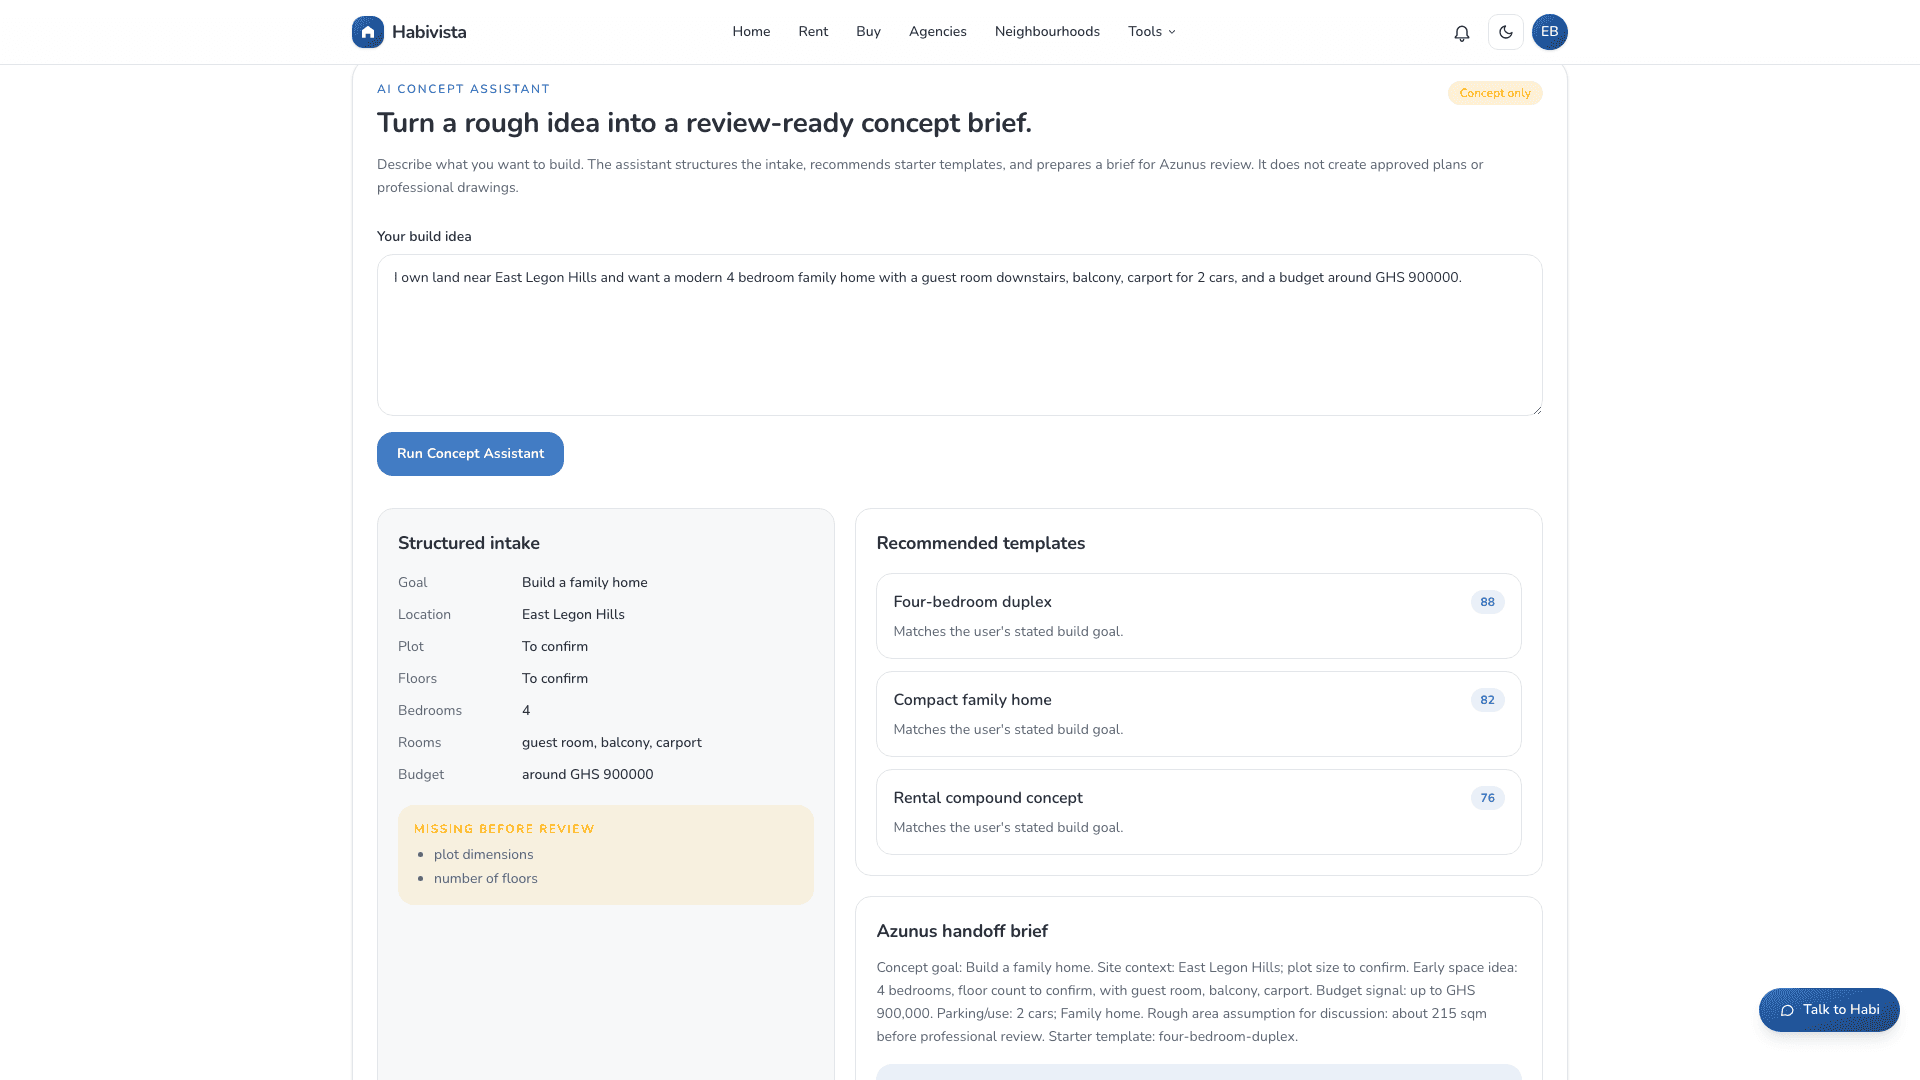
Run the Concept Assistant

The assistant converts plain-language intent into structured requirements, template recommendations, and an Azunus handoff brief.

  • Sign in first so the run is tied to the user account.
  • Enter the land location, goal, rooms, floors, budget, parking, and style preferences.
  • Review missing information before opening the visual handoff.
Concept Assistant result with structured intake and handoff

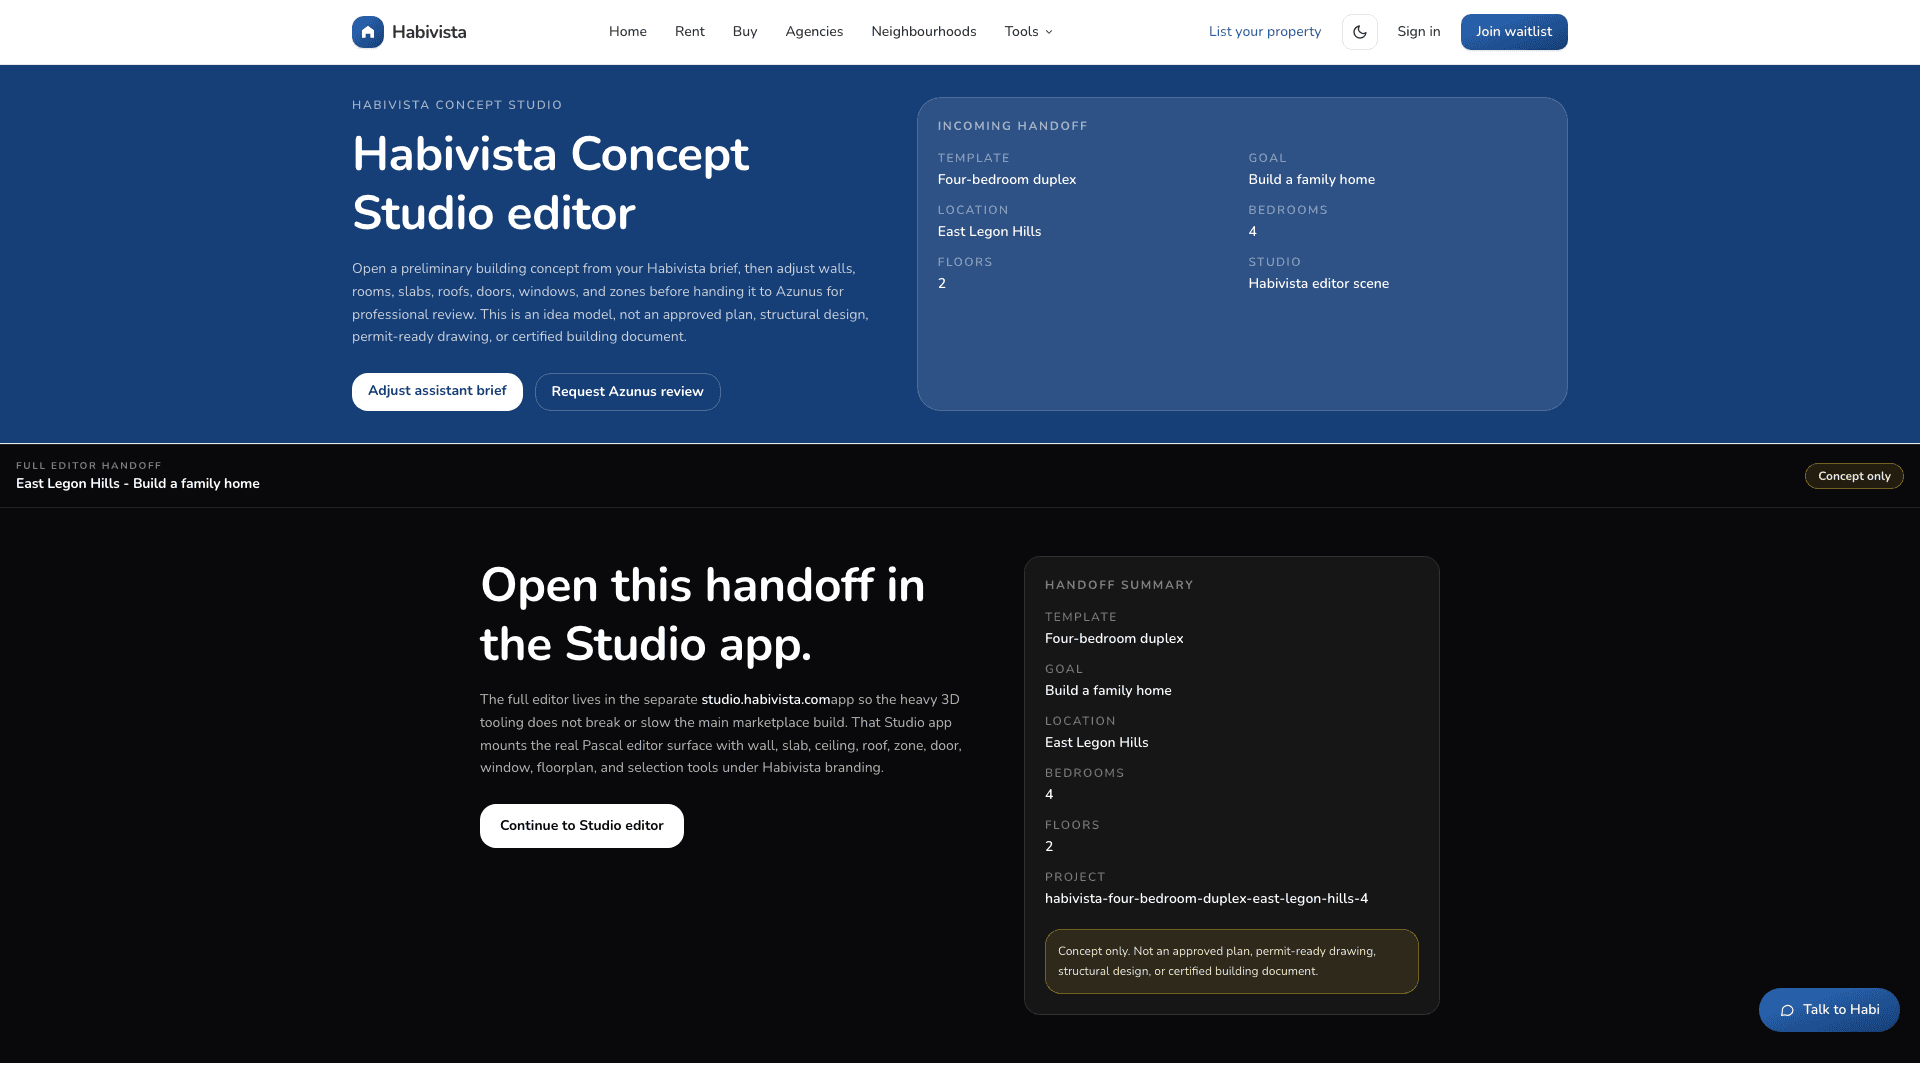
03

Confirm the visual handoff

The handoff page confirms the selected template and brief values before the user continues into Studio.

  • Check goal, location, floors, bedrooms, and template.
  • Use Continue to Studio editor to open studio.habivista.com.
  • Treat the marketplace as the record system and Studio as the visual workspace.
Visual handoff page before opening Studio

04

Work inside the Studio editor

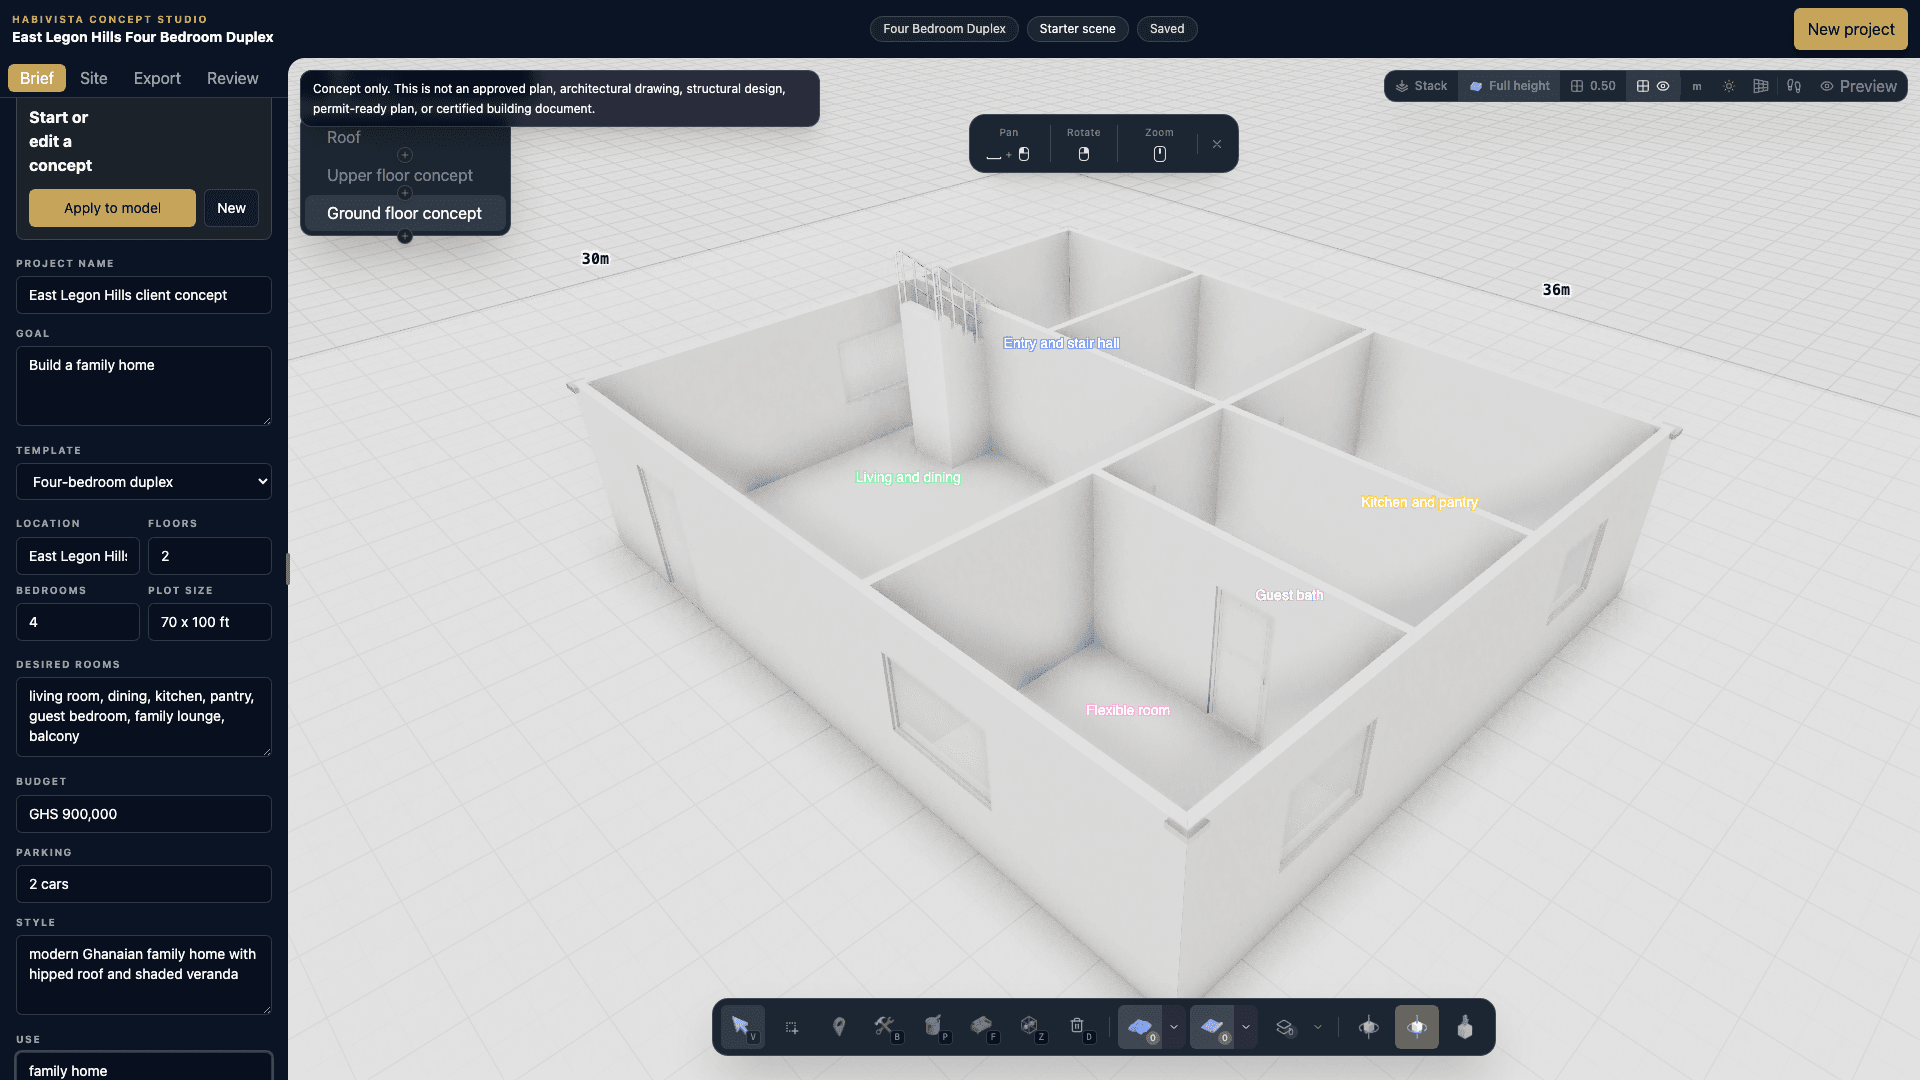
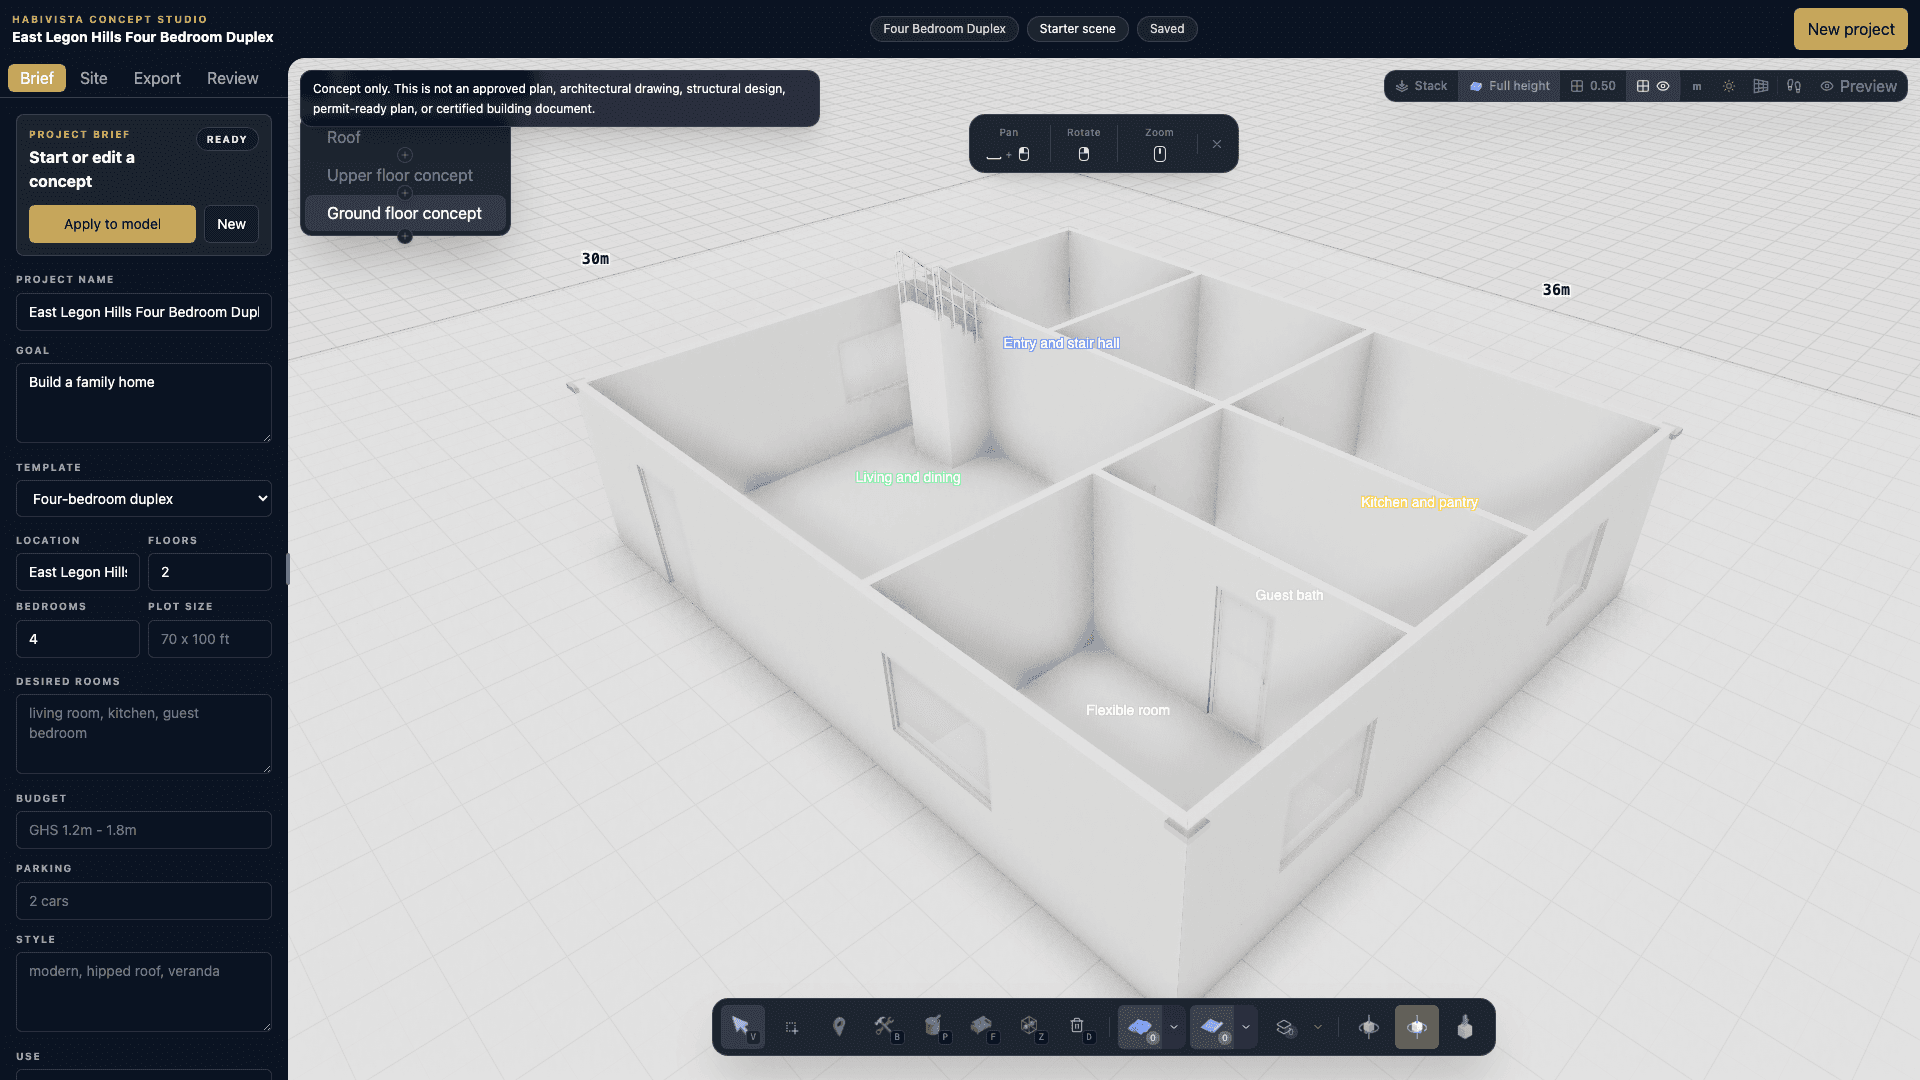
Studio contains the scene canvas, Brief/Site/Export/Review tabs, display controls, camera controls, level selector, and bottom toolbar.

  • Use the Brief tab for project name, goal, template, location, floors, rooms, budget, parking, style, and use.
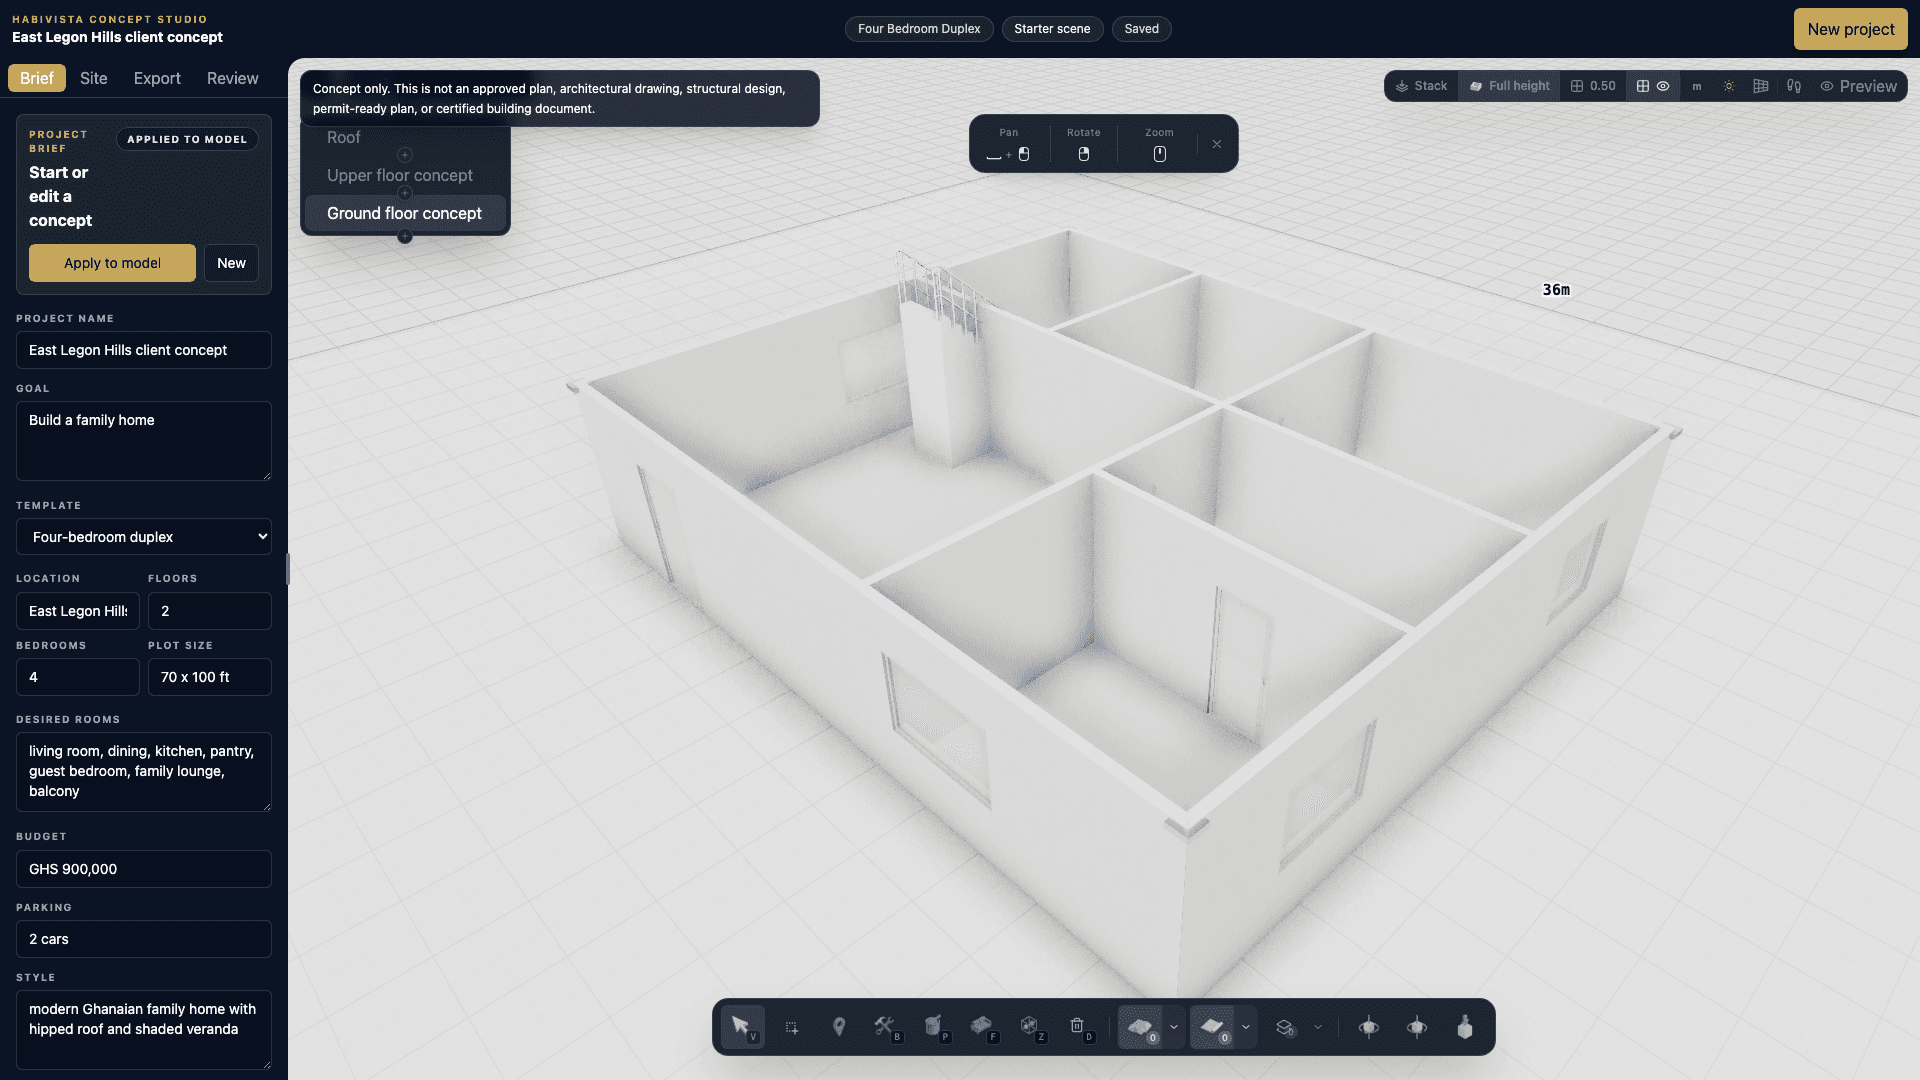
  • Click Apply to model after editing the brief.
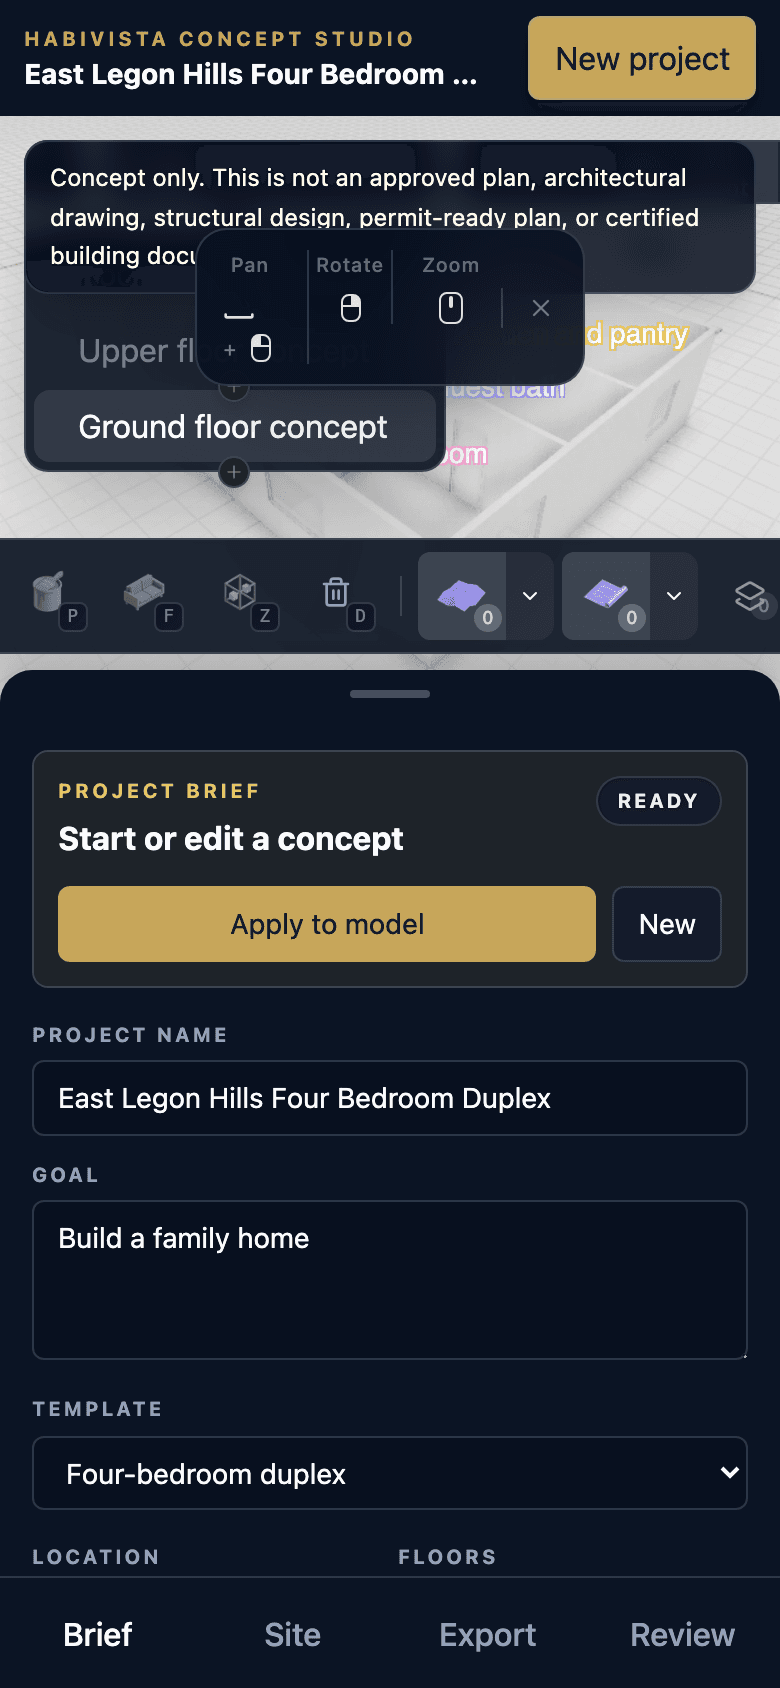
  • Use desktop or tablet for serious scene work; mobile is better for review.
Studio editor with brief panel and 3D scene

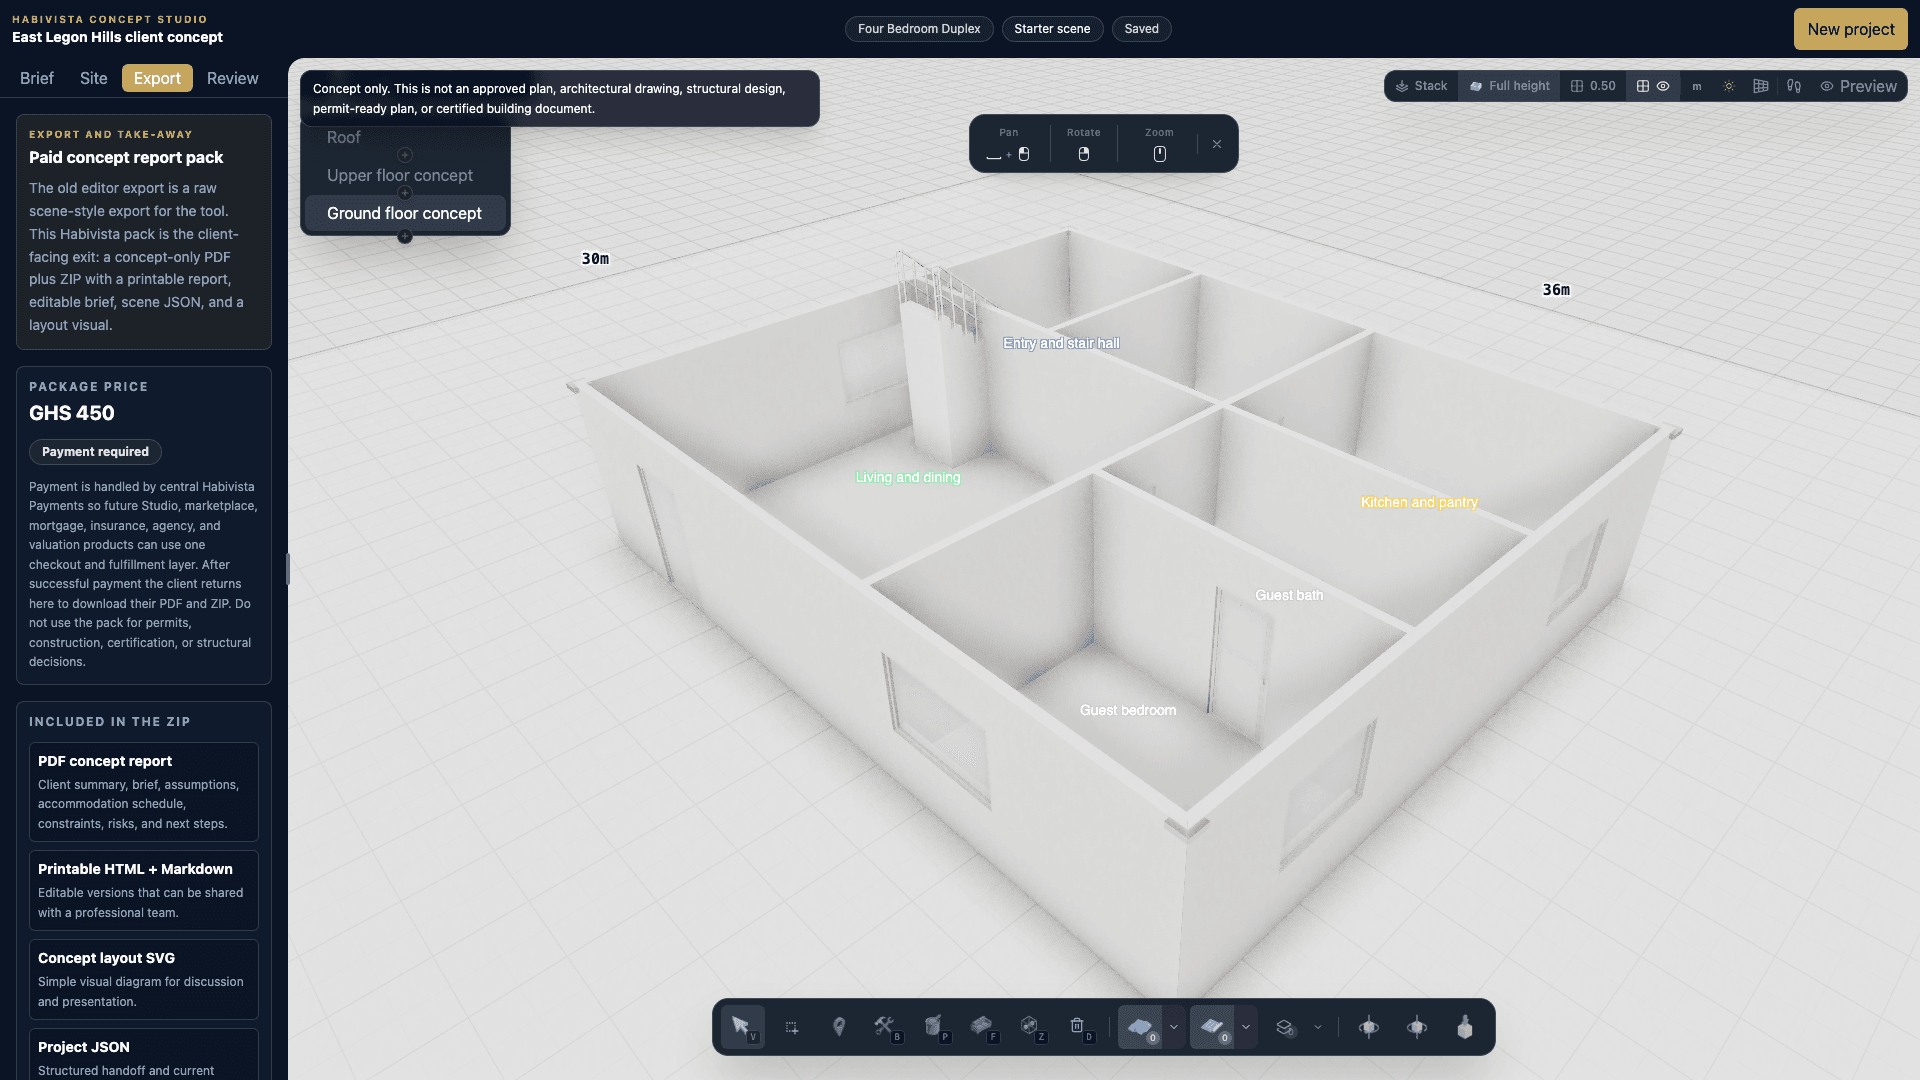
05

Offer the paid report pack

The report pack is the take-away path for clients who want PDF and ZIP files before requesting full professional review.

  • Current package price is GHS 450.
  • ZIP includes PDF report, printable HTML, Markdown brief, SVG layout, and project JSON.
  • Downloads must stay locked until central payment verification succeeds.
Export tab with paid report pack

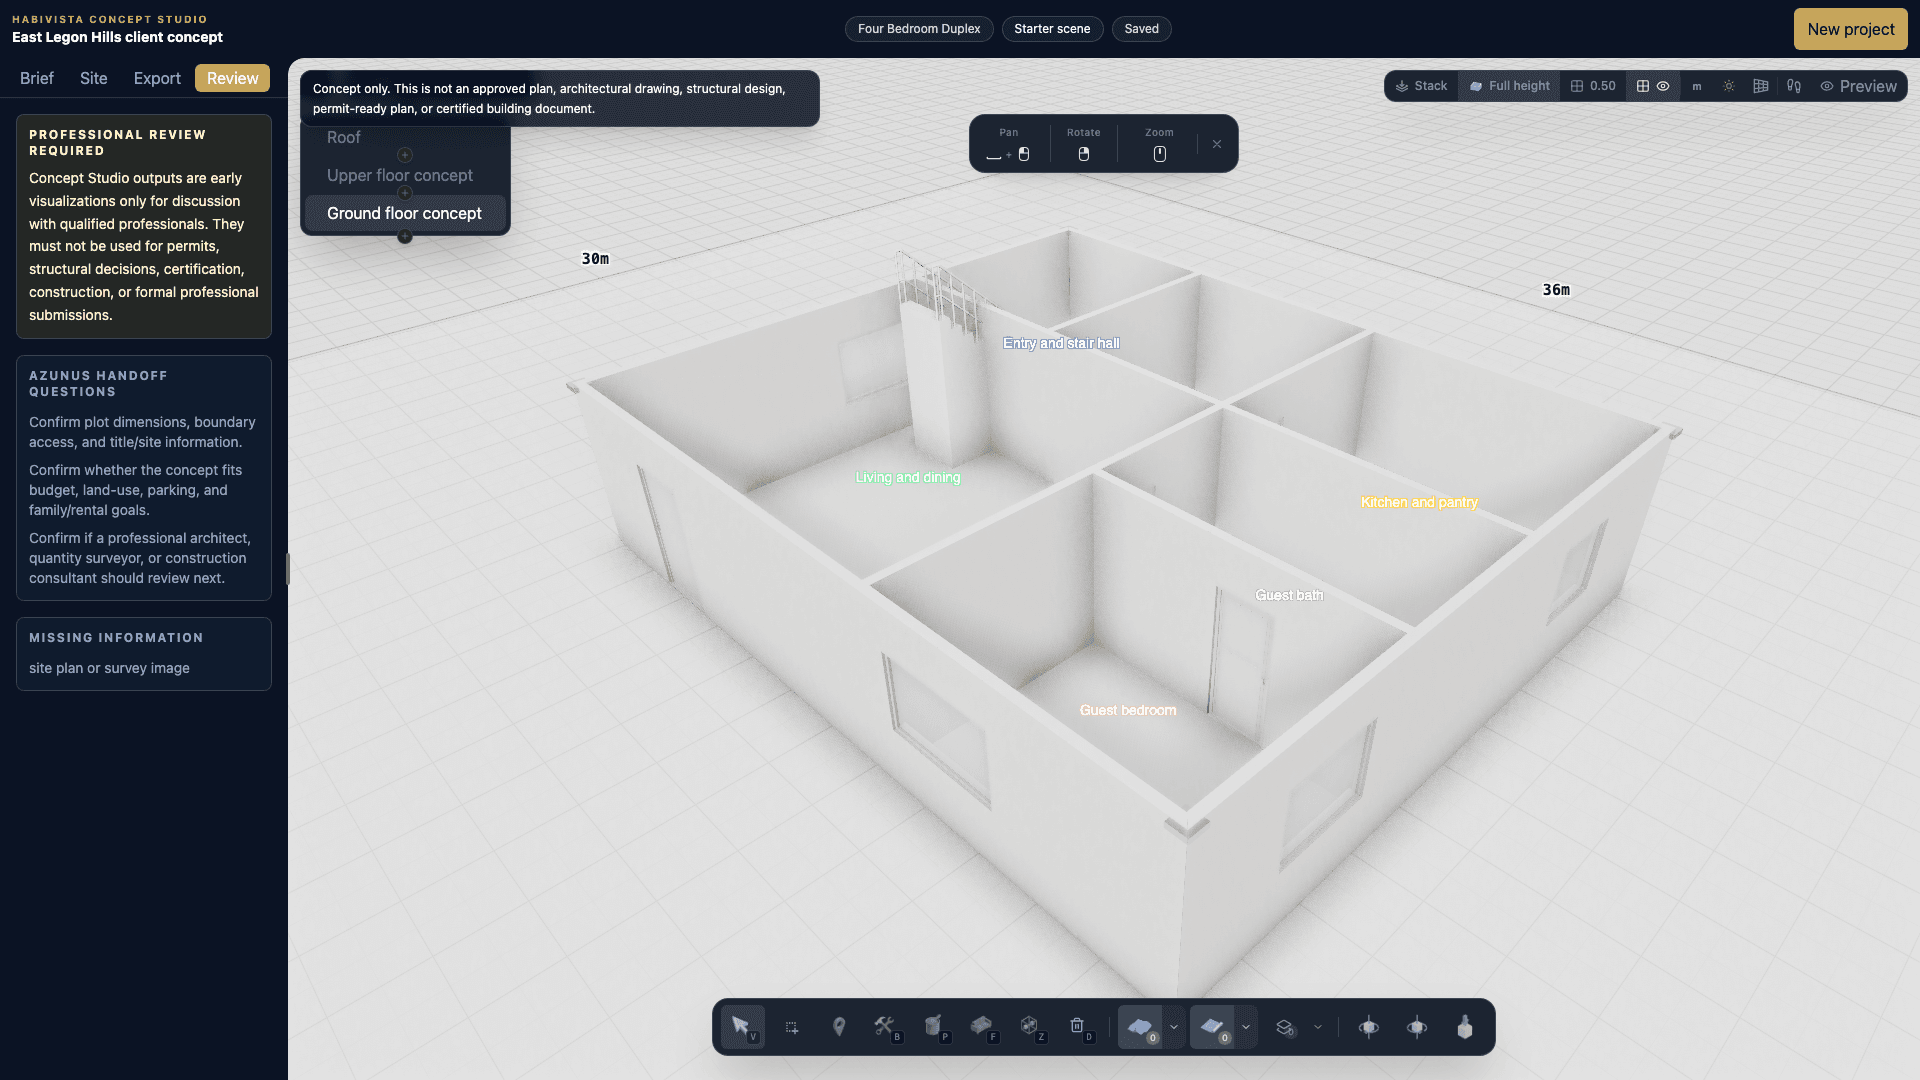
06

Prepare the Azunus review handoff

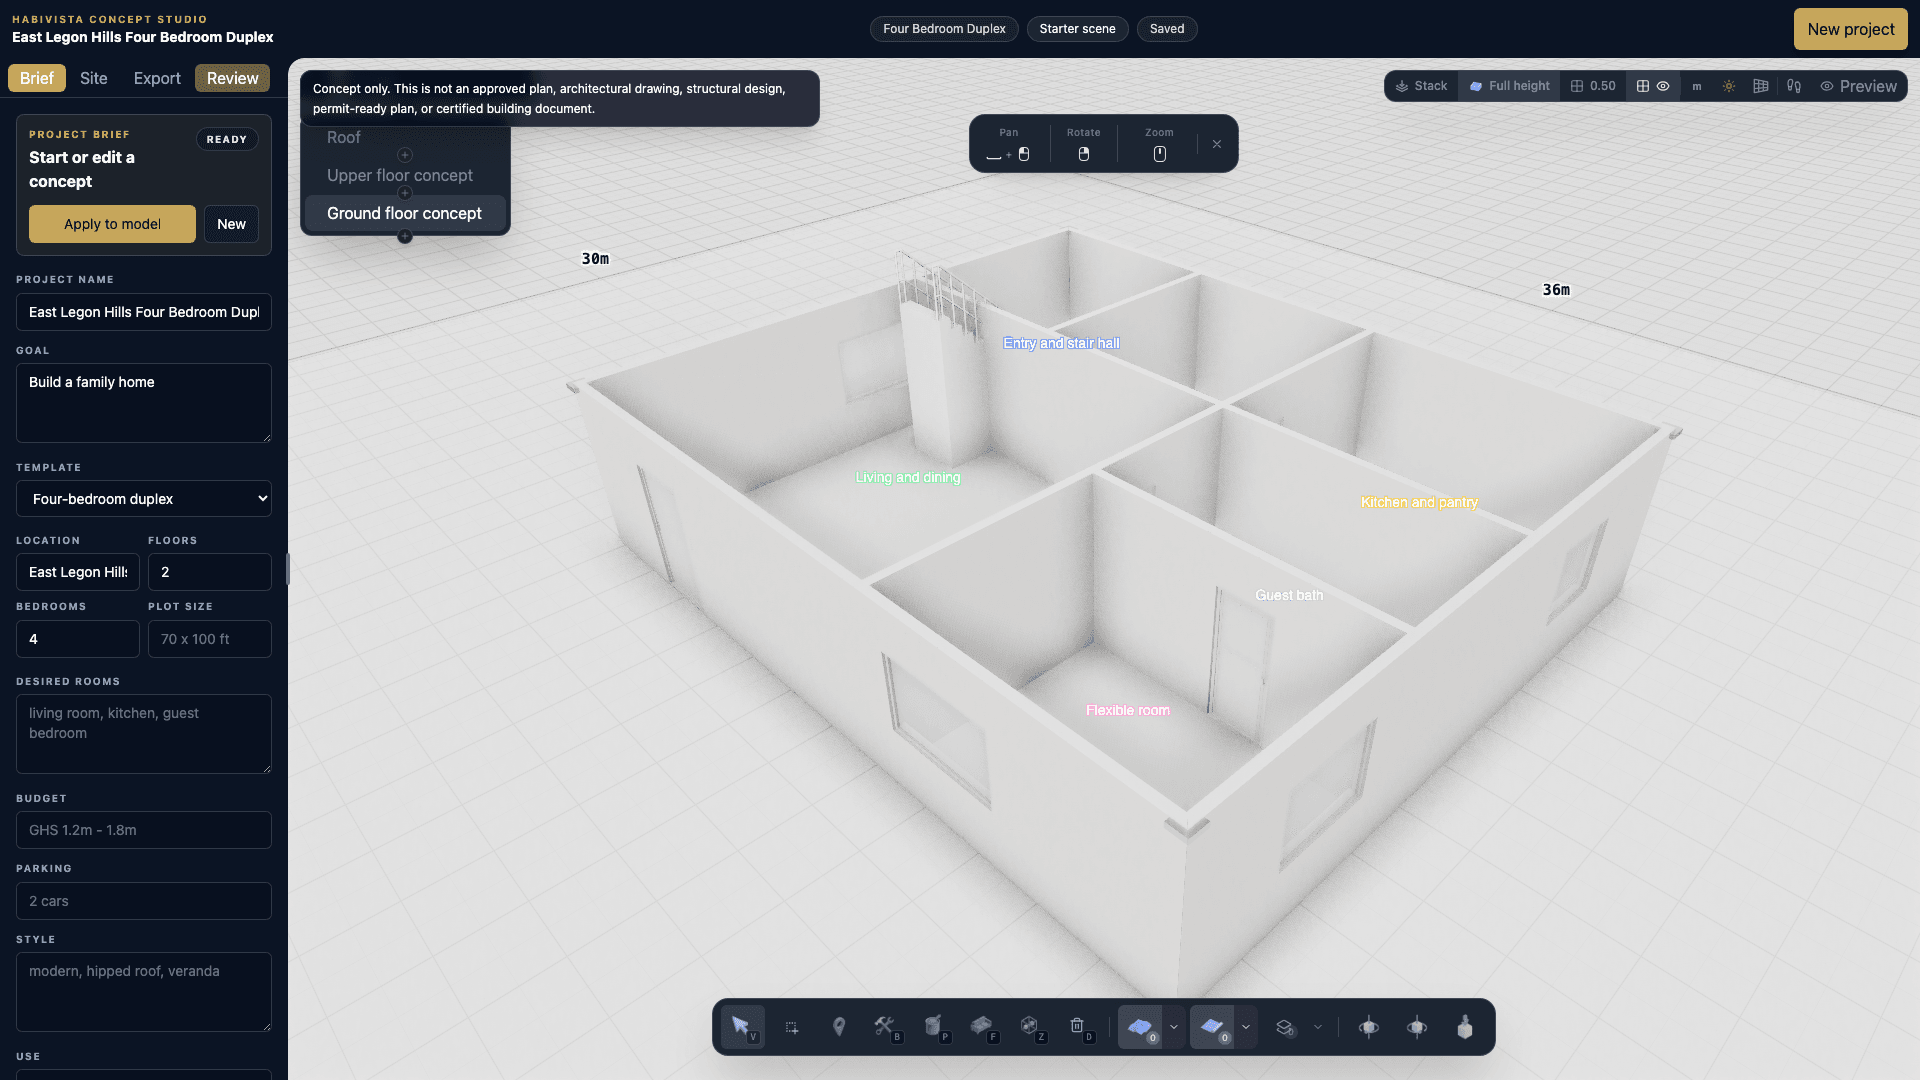
The Review tab frames what a professional still needs to confirm before design, costing, land-use, or construction decisions.

  • Confirm plot dimensions, access, boundary, and title or site information.
  • Confirm budget fit, parking fit, land-use fit, and family or rental goals.
  • Repeat that the model is a concept only, not a professional plan.
Review tab with professional handoff guidance

Reference

What Studio is showing.

Use these notes to explain the editor without drifting into architectural claims.

Scene hierarchy

  1. 1.Site
  2. 2.Building
  3. 3.Level
  4. 4.Wall with items such as doors and windows
  5. 5.Slab, ceiling, roof, zone, scan, and guide references

Client demo script

  1. Open Concept Studio.
  2. Explain the concept-only boundary.
  3. Run the assistant with the client's rough build idea.
  4. Review structured intake and missing information.
  5. Open the visual handoff in Studio.
  6. Show the scene, levels, rooms, zones, walls, openings, and roof controls.
  7. Edit the Brief tab and apply it to the model.
  8. Show Export for the paid report pack.
  9. Show Review for Azunus and professional next steps.
  10. Close by repeating that professional review is required.
Brief edited before apply
Brief applied to model
Paid return export state
Mobile Studio editor

Troubleshooting

Common demo blockers.

Open visual Studio button is missing+

Check HABIVISTA_FLAG_CONCEPT_STUDIO. The preferred value is true.

Assistant asks for sign-in+

Sign in through Habivista first. The assistant uses client auth context.

Assistant button is disabled+

Confirm sign-in, HABIVISTA_FLAG_CONCEPT_STUDIO_AI, and a usable prompt.

Studio scene looks stale+

Click New project or add reset=1 to the Studio URL.

Downloads are disabled+

Payment must be verified before report files unlock.

Mobile feels cramped+

Use mobile for review. Use desktop for editing and client working sessions.

Before a live session

Operator checklist

Confirm Concept Studio loads, Studio opens, the assistant works with a test account, Apply to model updates the scene, Export shows the report pack, and Review shows professional handoff guidance.